The Hornby turntable uses the "Geneva disc" indexing mechanism. This is a motor driven disc that turns one revolution per turntable exit.
For about half of that revolution, it pushes the turntable around to the next position; for the other half, it locks the turntable in position. The disc, motor and gearing that drives the disc is all located under the red moulded top cover; this has latches on the side to hold it in place and can be easily opened.
To index this turntable using a TXC1, a magnet needs to be mounted to that disc that can be sensed when it is in the "latch turntable in place" part of its movement. Ian Mayor has taken a few photographs of his installation and they are provided here.
Before you start, program the turntable type into the TXC1 by following the instructions in section 5.2.1 of the manual.
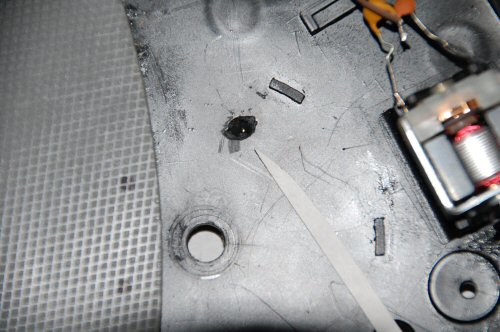
Ian mounted the magnet by drilling an appropriate diameter hole in the disc:

The 3 pin magnetic sensor then needs to be mounted. That can be above or below the disc, but it needs to be close enough to the magnet that the sensor detects the magnetic field. Ian mounted his sensor under the turntable base.
Before gluing the magnet, put the disc back into position and spot a hole into the turntable base when the disc is in the "latch turntable position" part of its travel.
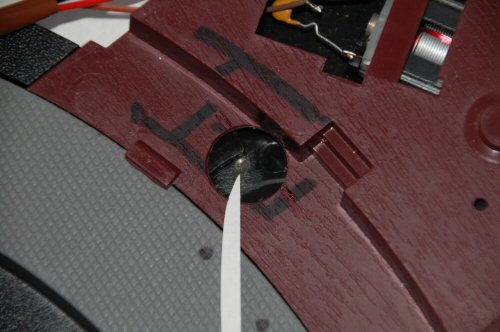
Ian's turntable base has the hole positioned as follows:
Ian has drilled a larger hole in the top, through which you can see the disc and magnet. If mounting the sensor underneath, you won't need that. However you can see where the magnet needs to be to operate the sensor:
Once you have marked the holes, Use epoxy to glue the magnet into the disc.
Test the sensor in your chosen position before mounting it permanently. Remember the sensor is most sensitive with its flat faces parallel to the magnet, not with it side or end on.
You can test whether the sensor is activating by going into a “factory test” mode as follows:
- With power to the board off, hold down the LEARN button
- Apply power (e.g. by plugging in the power connector to the board)
- The display will scroll “CML turntable controller" and its serial number
- The display will be blank for around 20 seconds while it lights all the segments of the front panel display, if that’s connected
- Then one bar of the right hand display digit will light.
- Once you’ve reached that point: if you put the sensor by the magnet, the left hand digit will display “3” and the decimal point on the right hand side will go out. If you move the magnet, the left hand display digit will blank and the right hand decimal point will be on.
- Put the sensor into your chosen position then move the disc round by hand. (You may need to remove the gears - take a photograph first to make sure you can get them back in the right place). You want the sensor to detect when the magnet arrives, and stop detecting when it is moved away.
With thanks to Ian Mayer for the use of his photographs.
There is also a PDF Technote available HERE with further instructions and photographs (TN-TXC1-001)